
Nothing is more fun than recreating a racing track at home, especially if you love RC cars. It’s fun to use it together with your friends and family.
Not to mention that it is exceptionally entertaining to see your work coming to life at the end of the project.
As a DIY type of person, I got interested in how to build a ho scale slot car track from scratch.
That is why I decided to share my slot RC car track building project, and outlining all the supplies and instructions you need to be aware of.
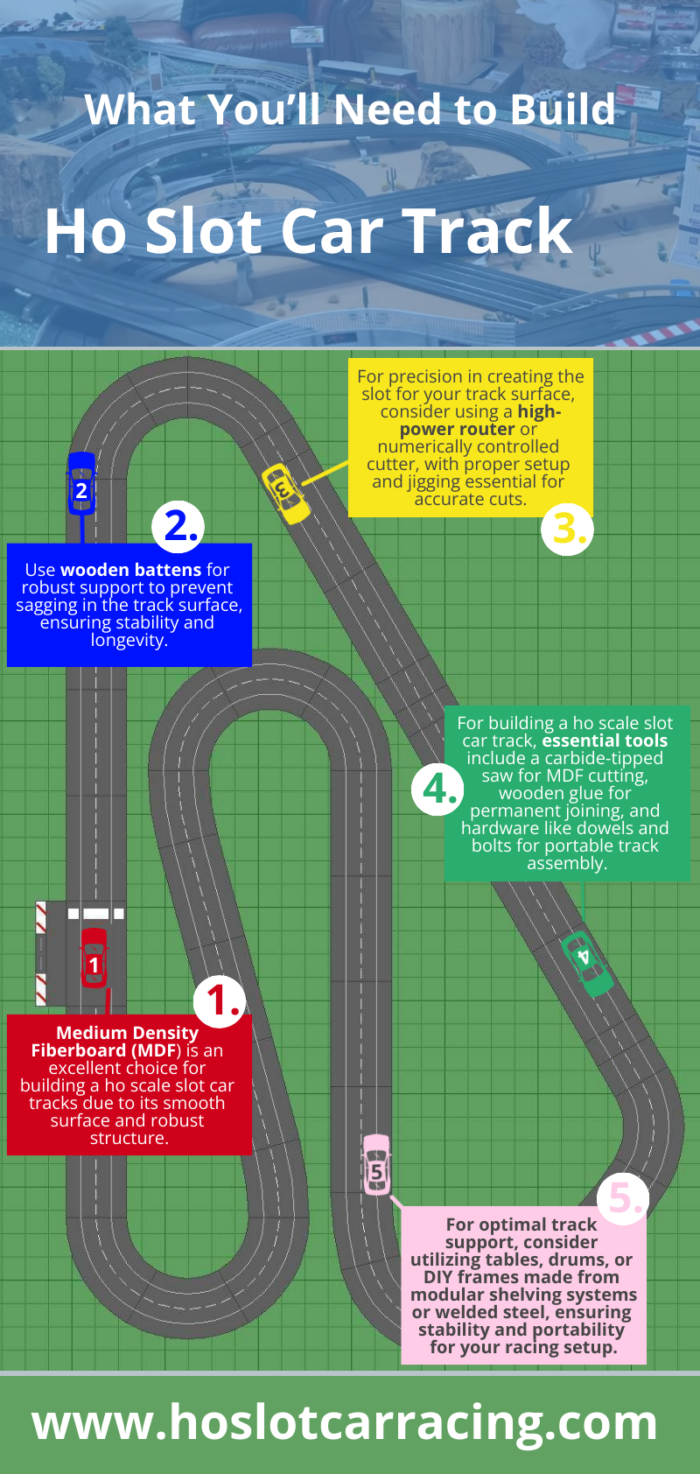
Table of Contents
What You’ll Need
1. Medium Density Fiberboard (MDF)

Medium Density Fiberboard is an excellent choice for building a ho scale slot car tracks due to its smooth surface and robust structure.
MDF is relatively heavy, so opting for a thinner sheet is advisable for this specific project. A thickness of about 12mm is ideal, balancing durability with manageability.
For your slot car track, it’s best to select standard-sized sheets, typically measuring 8×4 feet.
Smaller sheets may seem tempting, but they complicate the construction process by requiring more joints, which can introduce weak points and uneven surfaces.
One common oversight is underestimating the amount of material needed. Ensure you have enough MDF to complete your project without interruptions.
As an alternative to MDF, chipboard is another viable option. Known for its smooth finish, chipboard can also serve well for slot RC car tracks.
When using chipboard, consider a thicker variety to enhance the track’s stability and longevity.
2. Wooden Battens
The track surface is prone to sagging under its own weight, necessitating robust support.
Wooden battens, which are strips of timber frequently utilized in construction, can provide this necessary reinforcement.
Opting for battens with a depth of 75mm is advisable to prevent any warping over time.
For those looking to cut costs, substituting wooden battens with MDF strips is a viable alternative.
Using MDF ensures that the material remains consistent, which significantly reduces the risk of warping.
When securing these materials, it’s important to choose the right fixings.
Standard wood screws can be problematic, particularly if they are placed too close to the edges of the wood or MDF. This can cause delamination or splitting.
To counteract this issue, it’s recommended to use more robust fastening solutions, such as thicker screws spaced further from the edges, or possibly even using adhesive in conjunction with screws to distribute the load more evenly and ensure a more secure hold.
3. Router
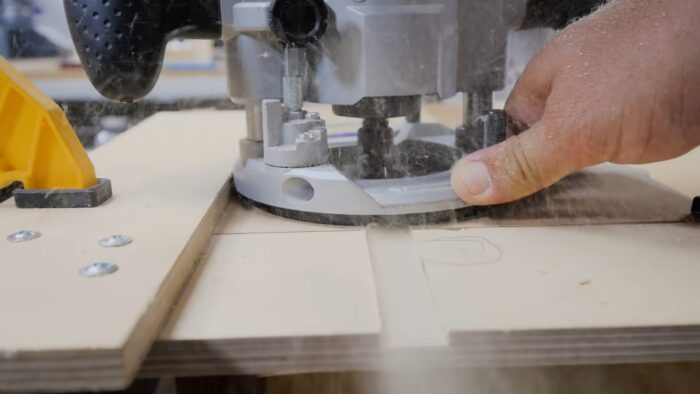
A router plays a crucial role in creating the slot for your track surface, an essential step in track construction. For optimal results, you might consider using high-power routers, which can efficiently handle 1-2 cuts for the slot.
Alternatively, numerically controlled cutters offer precision if you require highly accurate slot dimensions.
My personal preference leans towards the plunge router due to its exceptional ability to craft inlay grooves.
This type of router facilitates precise adjustments, making it ideal for detailed work where accuracy is paramount. While more budget-friendly routers are available and can certainly do the job, it’s important to exercise caution with their setup.
These less expensive models generally lack the robust construction of their pricier counterparts, making proper jigging crucial to compensate for this drawback and ensure clean, accurate cuts.
If you’re considering renting a router, it’s essential to select one that meets your specific needs. Assess the available routers to find one that can accommodate the necessary radius arm and shank size cutters required for your project.
Choosing the right router will help you achieve the desired outcomes with your track surface, ensuring both quality and efficiency in your work.
4. Tools And Equipment
A regular or circular saw is necessary to cut the straights and curves for your ho scale slot car track.
For MDF, make sure that the blade is carbide-tipped to cut through the high glue content of the fiberboard.
In building a slot car track, you’ll need wooden glue to join the track surface permanently.
If you need a guide on which glue to choose check out our article on glue comparison.
If you plan to join the sections of a portable track, you’ll need several hardware items, like dowels and bolts.
You’ll want to make a batten or an MDF strip beneath the joint to achieve a leveled surface. Also, prepare a hand drill to make holes for the hardware.
For a transportable track, you’ll need 2-3 bolts to make a tongue and groove joint.
Other tools you might need are lap counters and matte-finish paint. The lap counters are used for precise lap recording.
You might also need some adhesive transfer tape or impact adhesive to lay the braids and lane stickers.
5. Options for Track Support
To ensure your track is at an optimal height and not simply placed on the ground, there are several solutions you can consider.
Utilizing available items such as tables, empty drums, or cupboards can provide sturdy support for a permanent track setup.
It allows you to transform everyday objects into functional components of your racing setup.
For those who have Dexion, or a similar modular shelving system at home, repurposing these materials to construct a frame can be both cost-effective and environmentally friendly.
If you don’t have access to Dexion, consider constructing a frame yourself.
Welding a simple frame from affordable steel provides a durable option, while building a wooden frame offers both stability and ease of assembly.
If flexibility and ease of movement are priorities, adding legs to your track for portability is a practical solution.
To do this, prepare two triangular pieces of ½-inch plywood for stability.
For each leg, you will need:
- One 10-mm bolt
- Three 6-mm bolts
This setup allows you to assemble and disassemble the track quickly, making it ideal for those who may need to move their track between locations or store it when not in use.
Step-by-Step Instructions from Scratch
Step 1: Cut The Straights And Curves
Cut the desired size of straights for your slot car track.
To do this, simply clamp down a straightedge to lead your saw in cutting the straights.
For the curves, you need a more intrinsic job.
Lay three jigs:
- First to plot the inner and outer curve edges with a marker
- Second to route the exterior edge
- Third to lead the saw to cut the radial ends.
The finished curve should look similar to a plastic track.
Step 2: Fix The Wooden Battens Underneath
You know that the MDF board alone can slump under its own weight without proper support.
To avoid this problem, place wooden battens below.
Fix a piece of timber lengthwise on every side and cross pieces in each 40-60 cm distance.
For the curve tracks, use straight patterns underneath.
Use radial supports on the lower side of bends, similar to how you plot the cross pieces on the straight track.
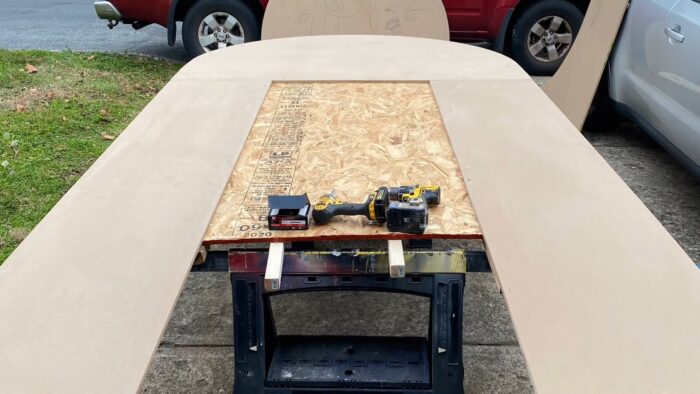
Step 3: Decide The Track Support
If you plan to use the track on the floor, you can skip this step and proceed to step 4. If not, decide what track support you want.
For permanent tracks, you can use tables, oil drums, or workbenches. These things all work with a little bit of adjustment to get the right levels.
If you decide to make legs for your track, prepare some triangular pieces of plywood and bolts.
Connect two triangular pieces of 12-mm plywood with a 10-mm bolt to make one leg. Bolt the top piece to the track using three 6-mm bolts.
Step 4: Join The Track Sections
The next step in building your own ho scale slot car track is to join several sheets of the board to make a smooth track surface.
If the track is permanent in its place, use screws to join the sheets together, then fill the joint.
For a transportable track, construct a batten under the joint, then level the surfaces.
Next, fasten the battens together with dowels and bolts.
Step 5: Cut The Slot
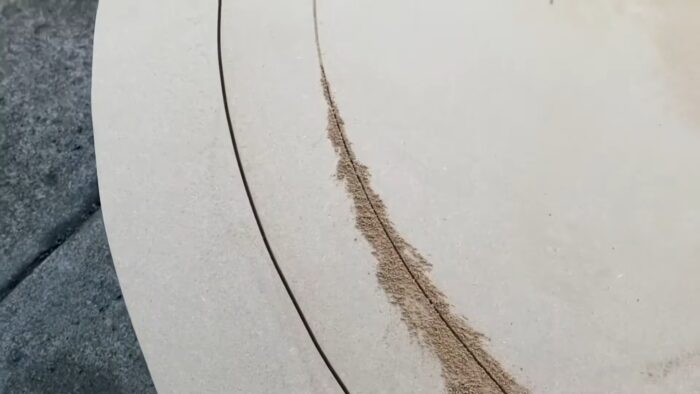
Before you cut the slot, decide between tape and braid because the latter requires a recess in the track surface.
As a general rule, the slot width should be around 3 to 5 mm wide and 9mm deep.
For braid, you want to cut a recess on either side of the slot. The recess size depends on the braid’s size.
Normally, the track braid is around 5.2-6m wide. It’s not necessary to recess the tapes.
Step 6: Position The Lap Counters
Place the lap counters in an area where there’s the least risk of counting errors, more particularly at a medium speed position on a flat level.
These trackers tend to be reliable when the car is securely in its own slot.
Keep away from areas where RC cars may be falling out or be up on two wheels.
Also, avoid areas where the guide is likely to lift out of the slot.
Step 7: Paint, Lay The Braid & Stickers, And Wire
Now, paint the track surface with your favorite color.
Use a brush, roller, or spray. I prefer a brush because it requires no masking.
Next, stick the conductor’s tape or braid on the track using an adhesive transfer tape or impact adhesive.
Take the ends of the tape underneath the track. Finally, mark the lanes with stickers and wire the tracks.
Now slot car track is ready for design.
Summary
Now that you know how to build a slot car track from scratch, you can have fun racing RC cars with friends.
It’s a little complex looking at the steps above, but the result will be worth the effort.
I suggest asking a professional when handling powerful router tools and wires.
Do you have something to share about constructing a slot car track from scratch? Let me know below.
Please share the article with your friends if you like it.